
(Figure 1)
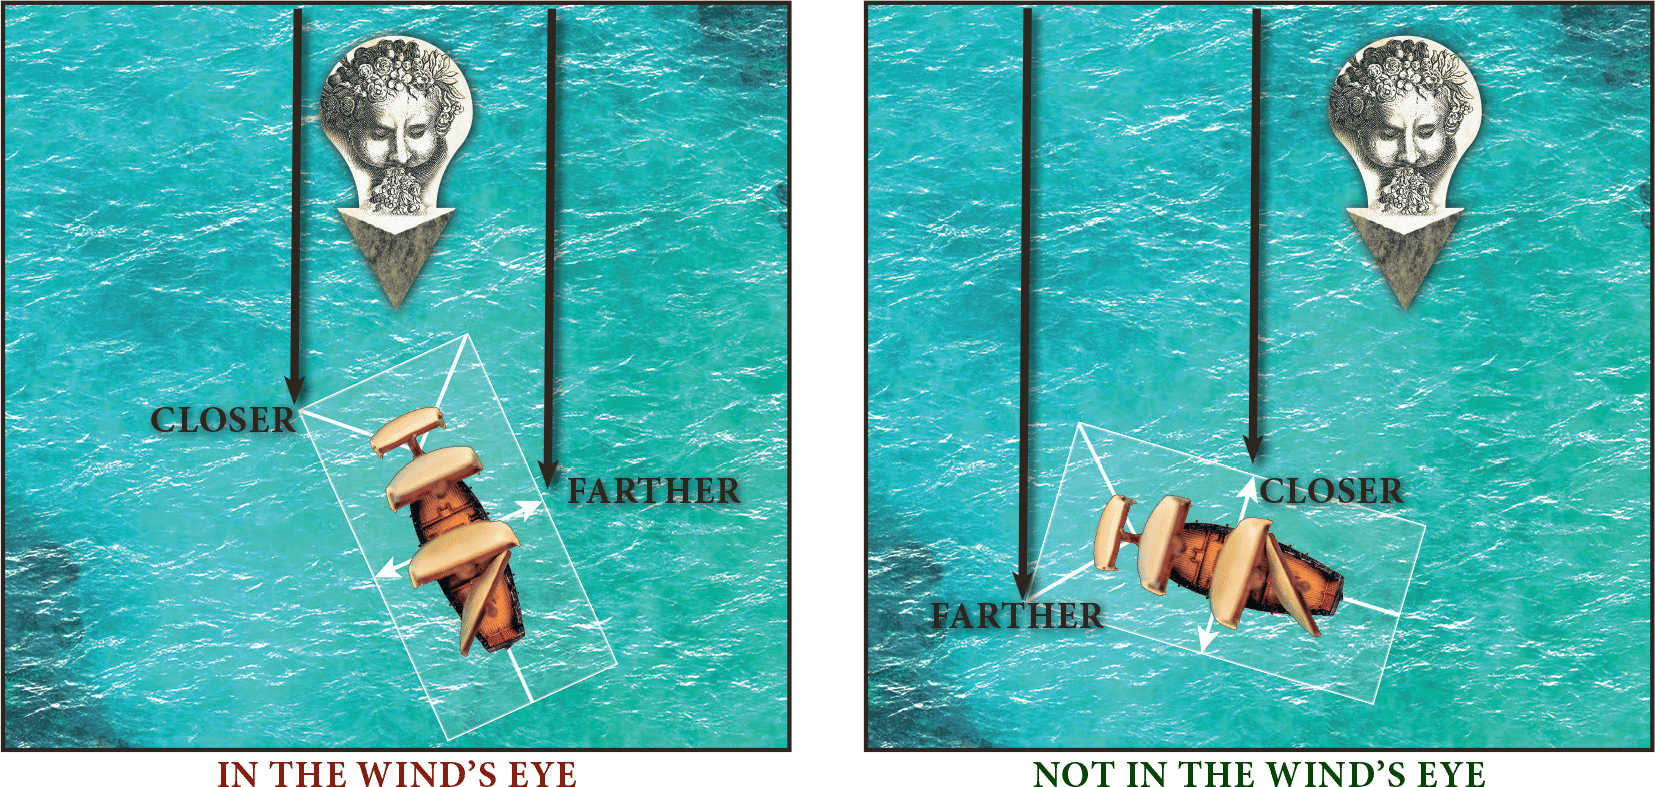
Lily has the initiative, so she will be the first to activate a ship and check the ship’s point of sail (Figure 1). It is determined that her ship is sailing large, because her stern is closer to the table’s weather edge than her bow. The ship’s large point of sail is 3 and it is currently at battle sails, so Lily needs to use the 3 speed template. Before moving, Lily decides she wants to try to go a little faster. She uses the seamanship action “Adjust Speed” to try and go faster. She succeeds her skill test and will now use the 4 speed template instead. Lily now places the template to either side of her ship, making sure to align the starting arrow of the template with the side arrow of the ship.
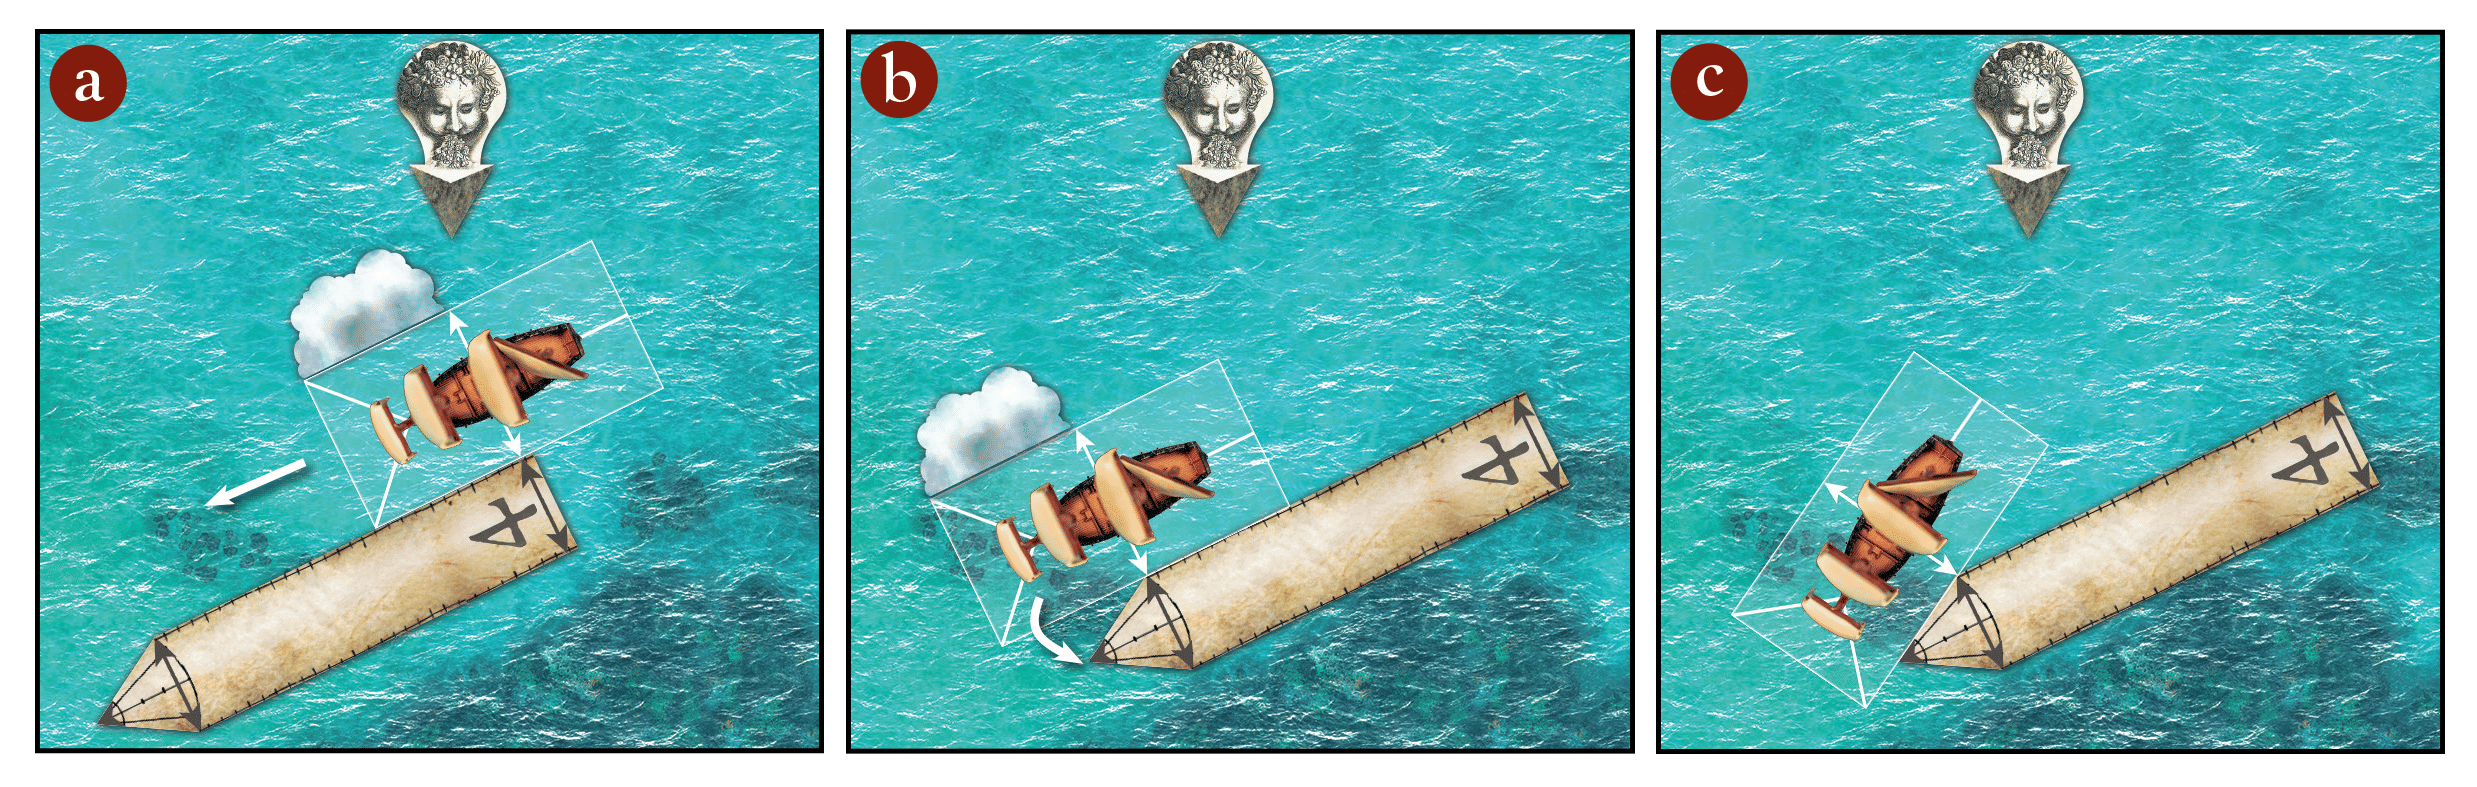
(Figure 2)
(a) Without moving the template, Lily must slide her ship along the full length of the template until her side arrow is at the ending arrow. (b) She will turn the ship by having it pivot along ending arrow’s corner towards the template’s turning edge. (c) Lily completes her movement activation by taking a Reload Crew Action to remove a reload marker from one side of her ship so that it is ready to fire a broadside in the Attack Phase.

(Figure 3) (Figure 4)
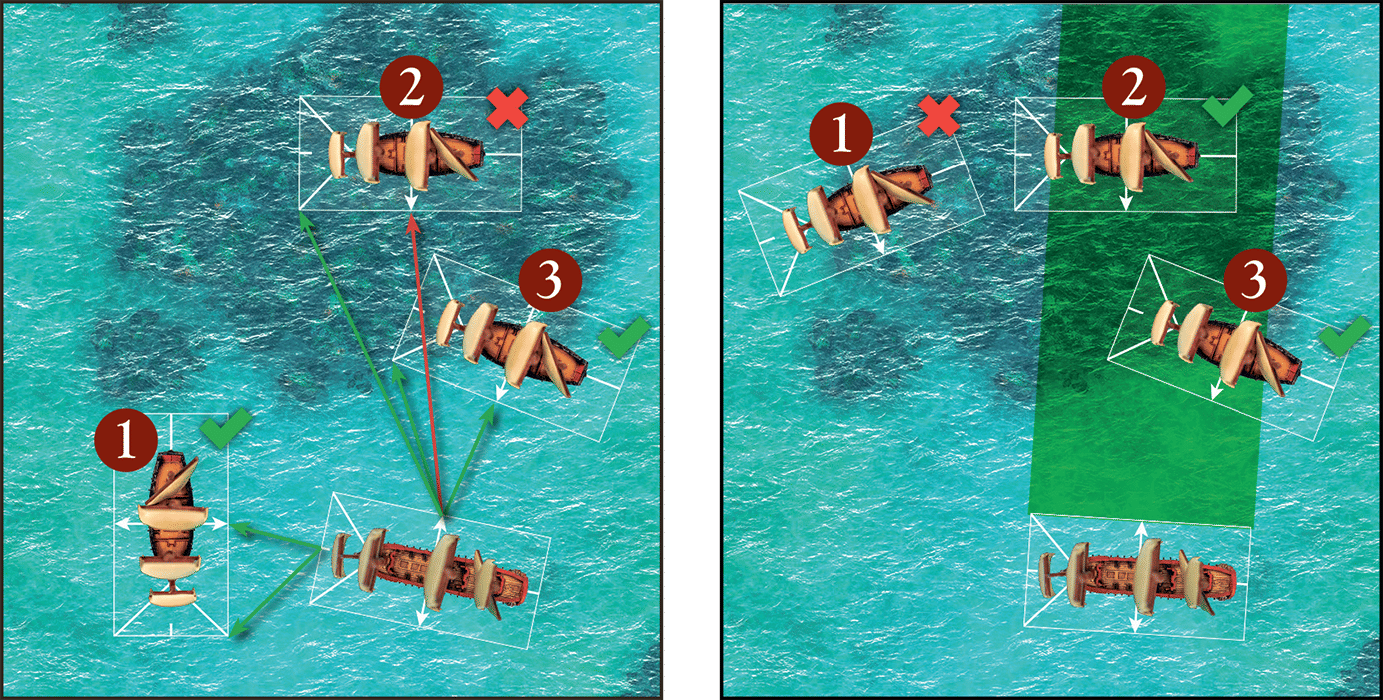
Mike's ship is within a yard arm length away from Lily's ship. He is going to attempt to a Boarding Action and Board Lily's vessel! He rolls a skill test for the ship attempting to board and succeeds. Now he has to move his ship into place, laying the ship's leading edge against the nearest edge of Lily's ship. Below are a couple examples of what that might look like:
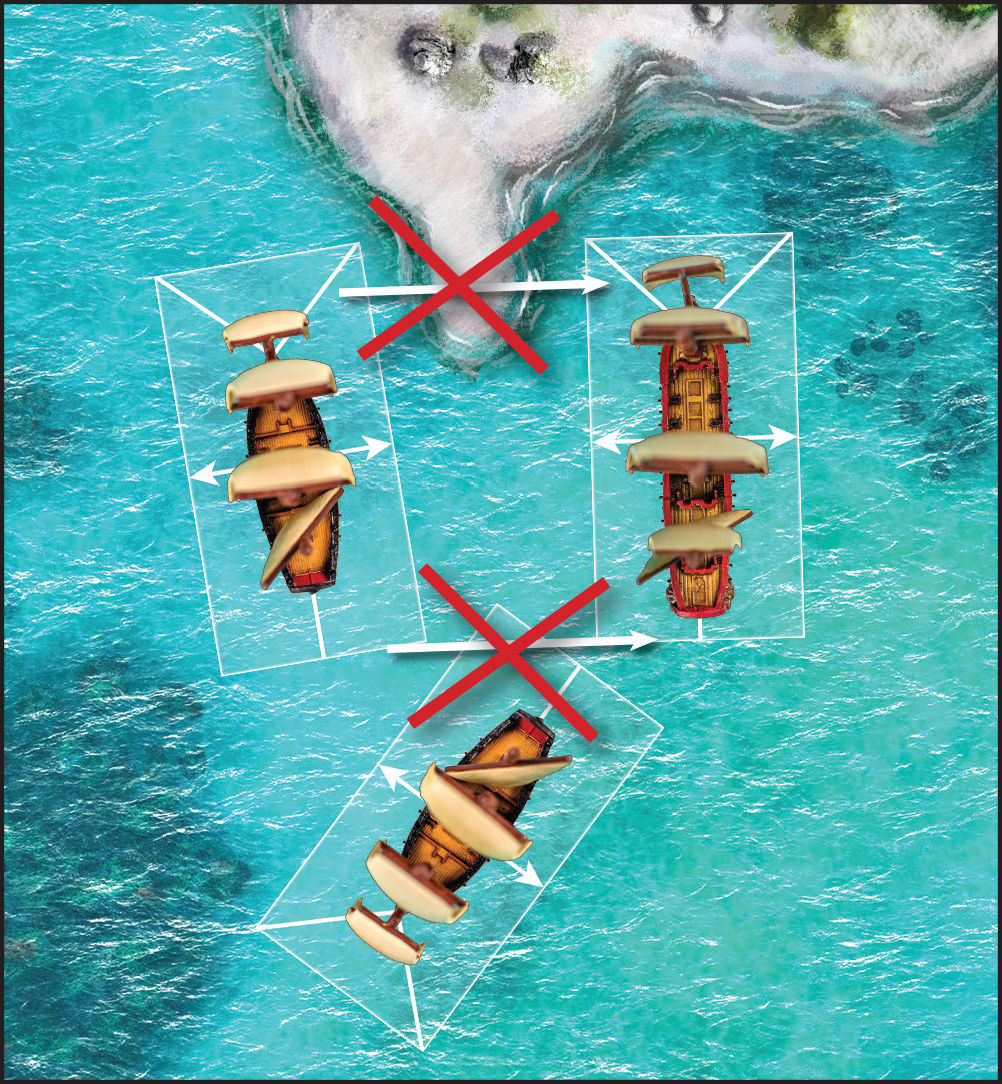
(Figure 5)
In the following example, Mike’s ship has no space to lay flush against Lily’s ship and cannot complete the boarding action. In this case, Mike may attempt a different crew action:
(Figure 6)
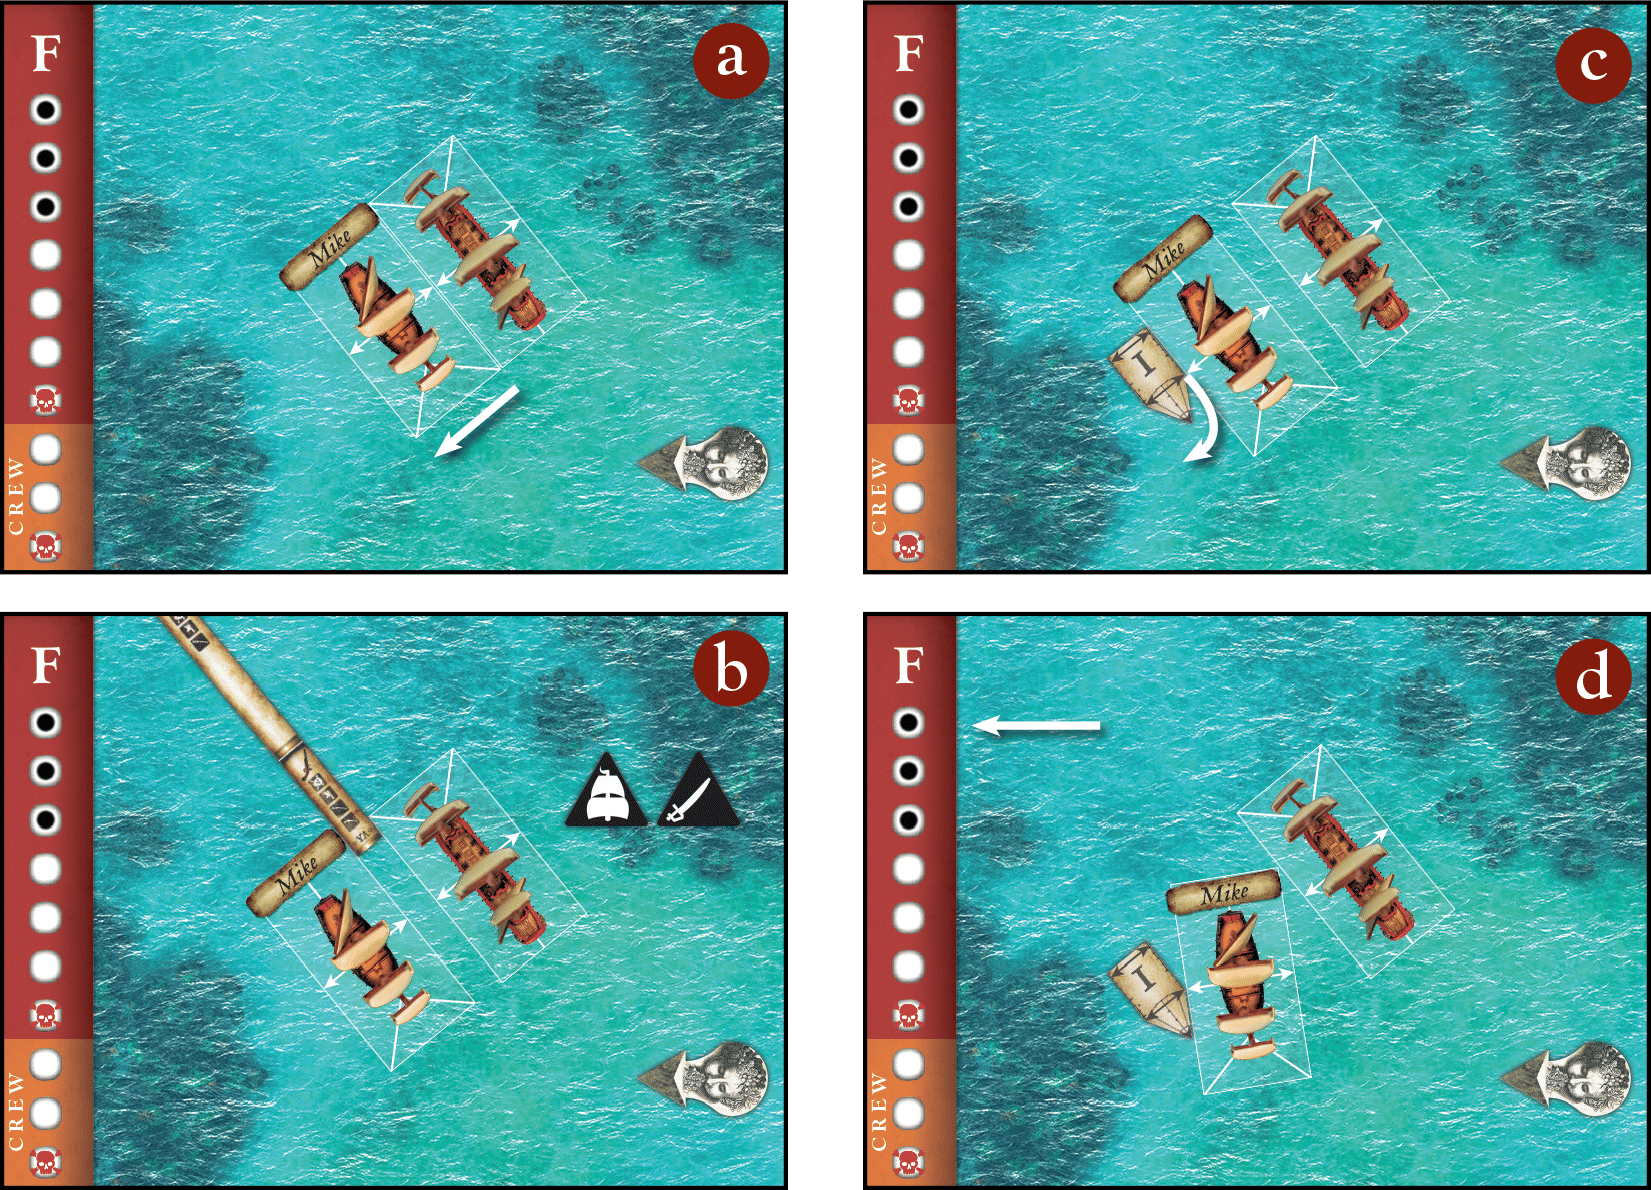
Mike’s ship is entangled with another ship, he wants to cut grapples and move to escape. Mike’s ship is in the wind’s eye and it is currently at battle sails. In order to move, he uses the Seamanship Action “Cut Free”. His skill test is successful. Mike moves his ship yard arm distance away from his opponent Normally, the cut free action would cause Mike’s ship to move using the speed 1 template, but, because the ship is in the wind’s eye, all Mike can do is make a turn using the speed 1 template turn. He would like to use the rally crew action to remove one point of fatigue and ends his ship’s move activation, but he cannot since he cut grapples during his ship’s activation.
(Figure 7) (Figure 8)
During the Attack Phase, players will alternate attacking with their ships, 1 ship at a time, until all ships have activated. After a ship has activated, remove its Wake marker to indicate that it has attacked (or won’t) this phase. During an Attack Phase activation, a ship may instead take an additional Crew Action if the ship has no opposing ships within Pistol Shot. If it does make an attack, it may make 1 (and only 1) of the following attacks: Broadside, Partial Fire, or Close Combat.

(Figure 9)
(a) Mike’s galleon (broadside 5) has an eligible shot on Liam’s 6th rate frigate (fortitude 2) at musket Shot. (b) Mike rolls 5 dice and gets , , ,, . The result is removed leaving 4 hits. (c) Liam’s frigate takes 2 damage as the number of hits has equaled its fortitude twice, and 1 point of Fatigue as there was a successful hit against it. (d) As a was rolled in the broadside attack, this die is rerolled to check for critical damage. A is rolled and there is no critical damage. Mike’s galleon is given a reload marker on the firing side and it is then Liam’s turn to attack with one of his ships